How to turn Location Services on for photos on an Android device using Android 10 (or newer)
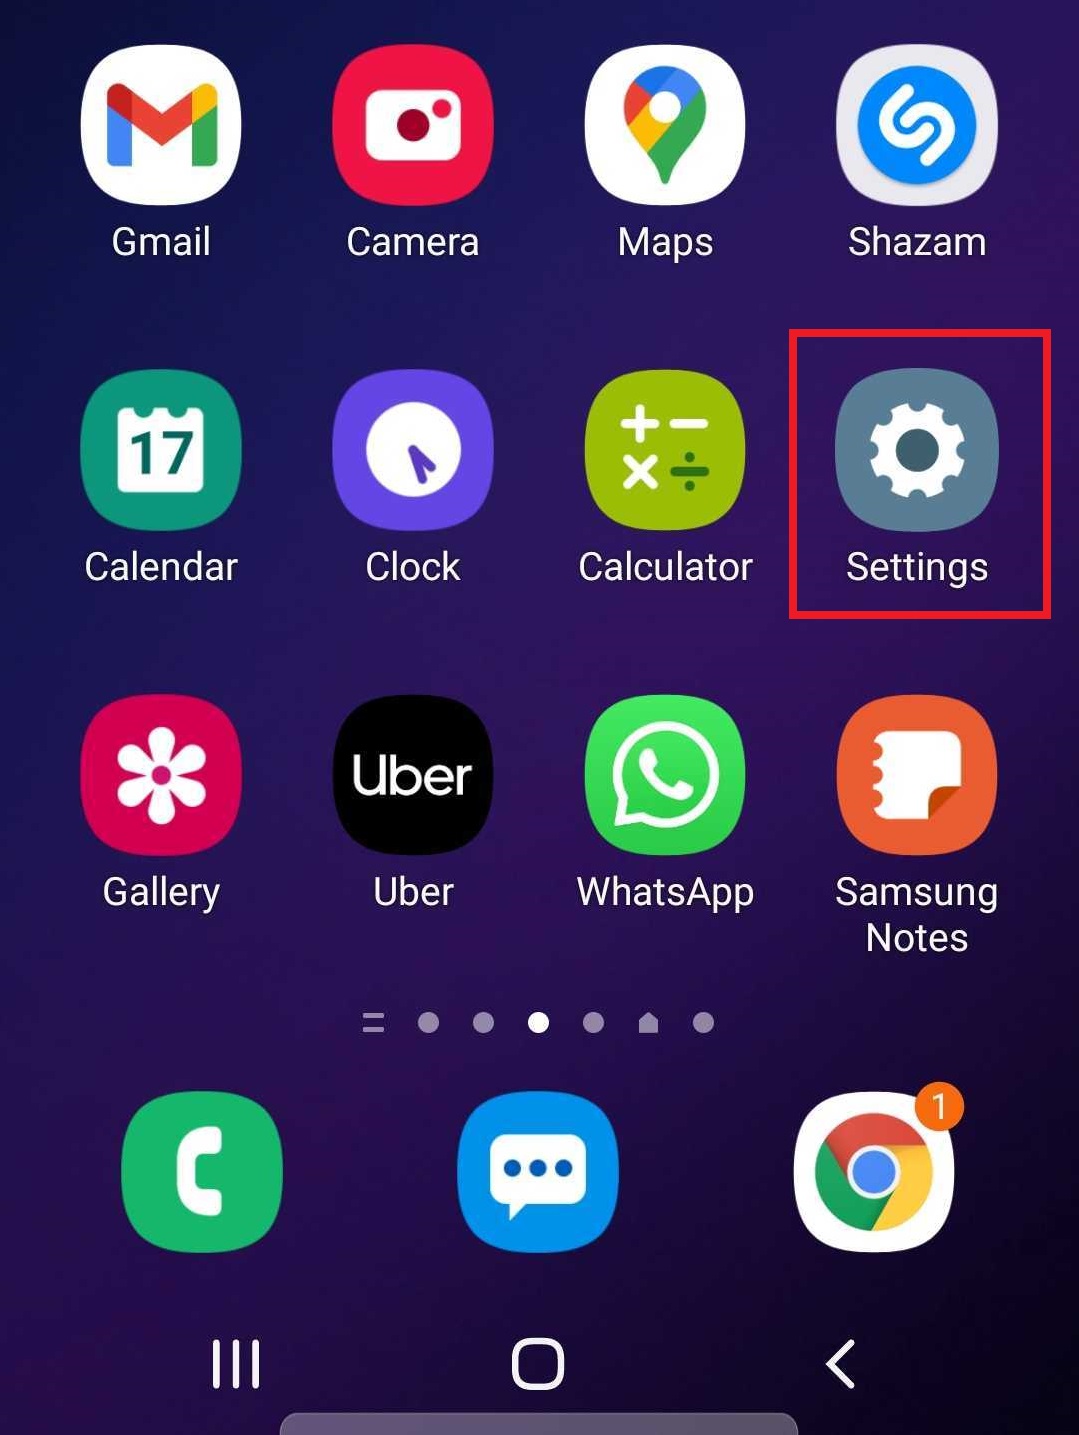
Step 1: Tap on the Settings icon (the one that looks like a cog)
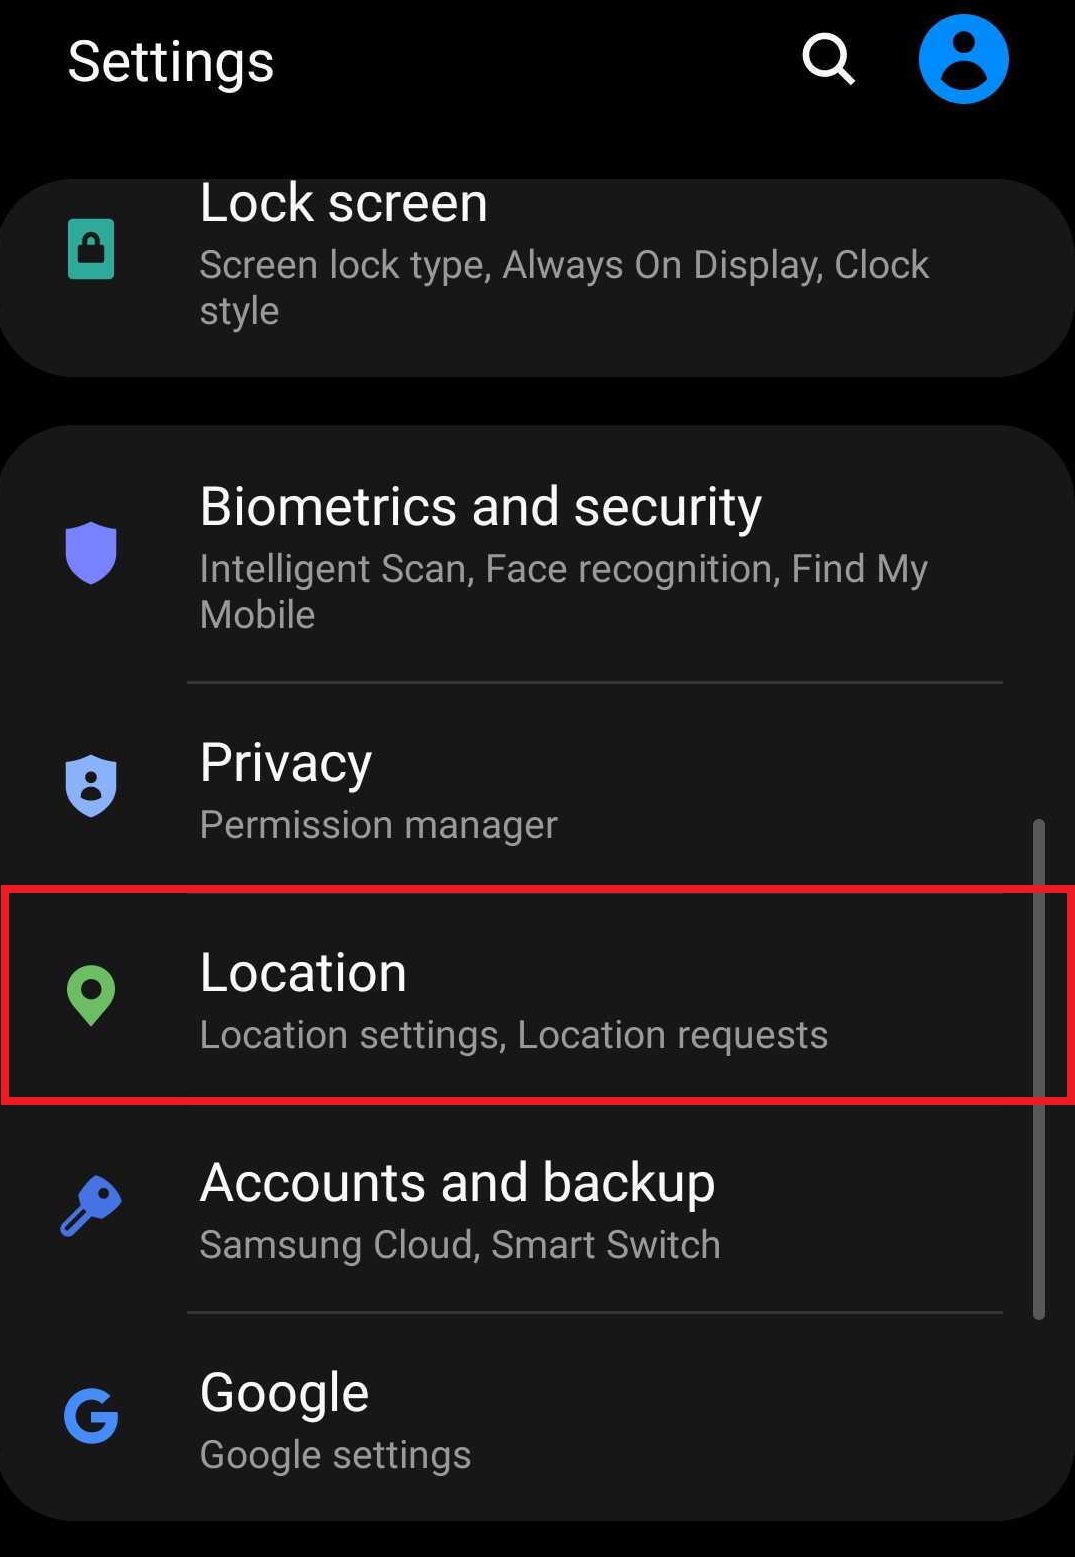
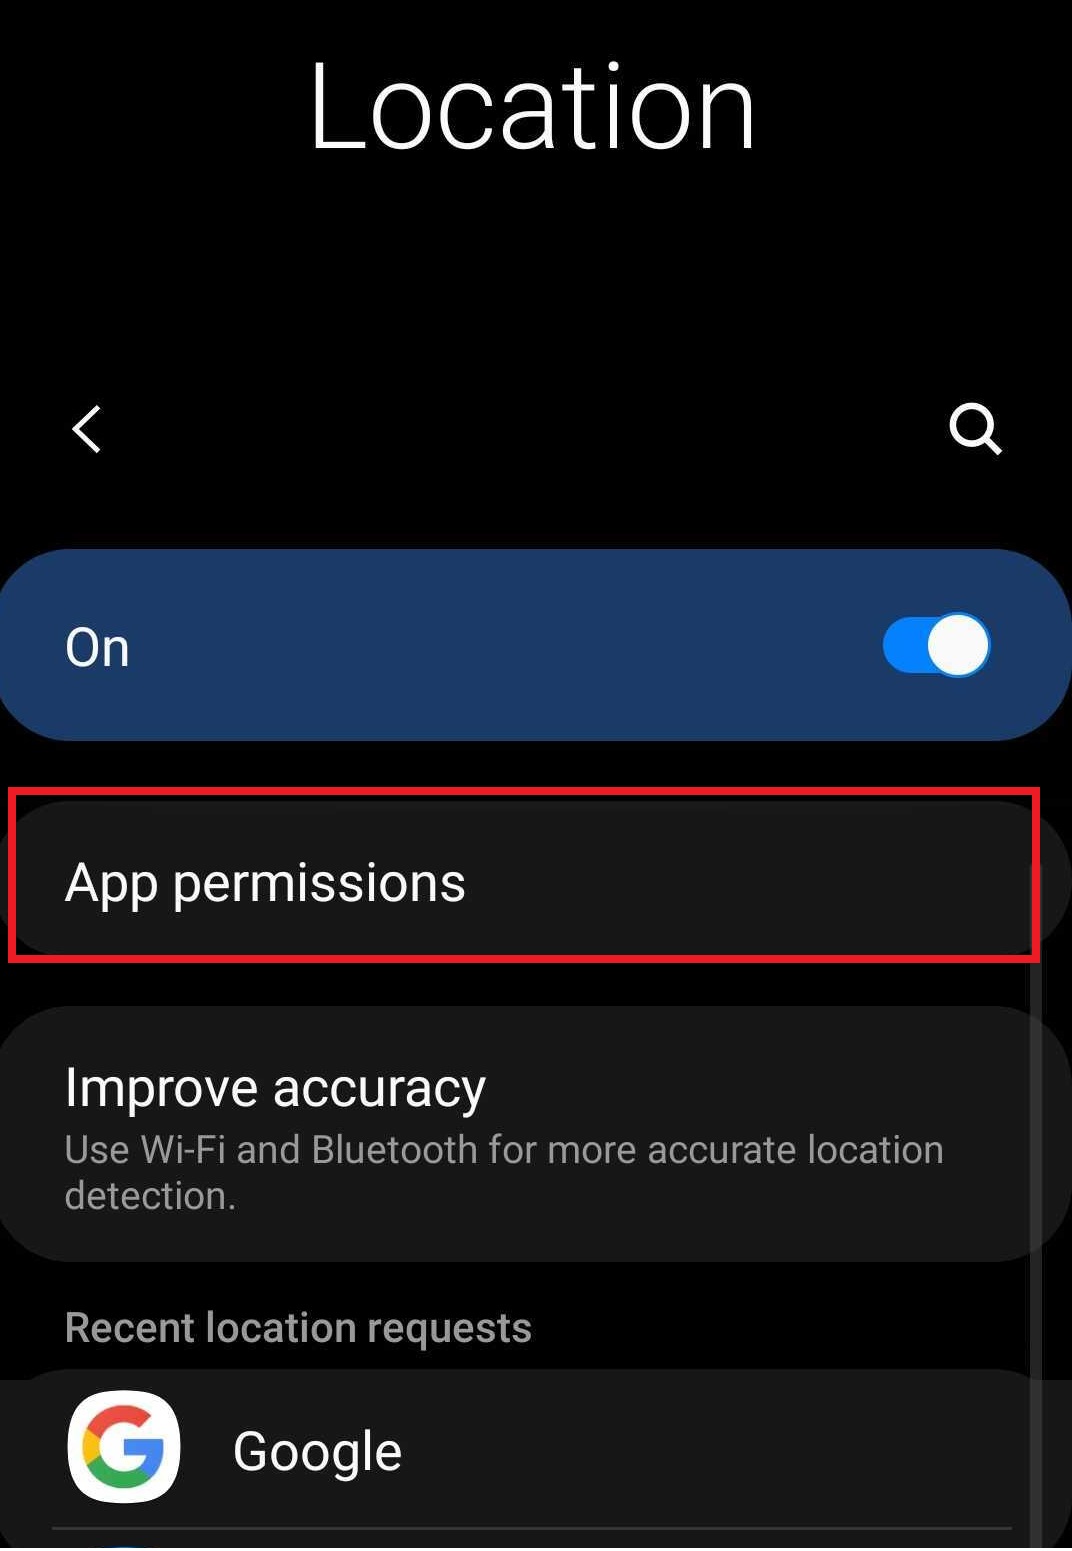
Step 2: Tap on “Location”
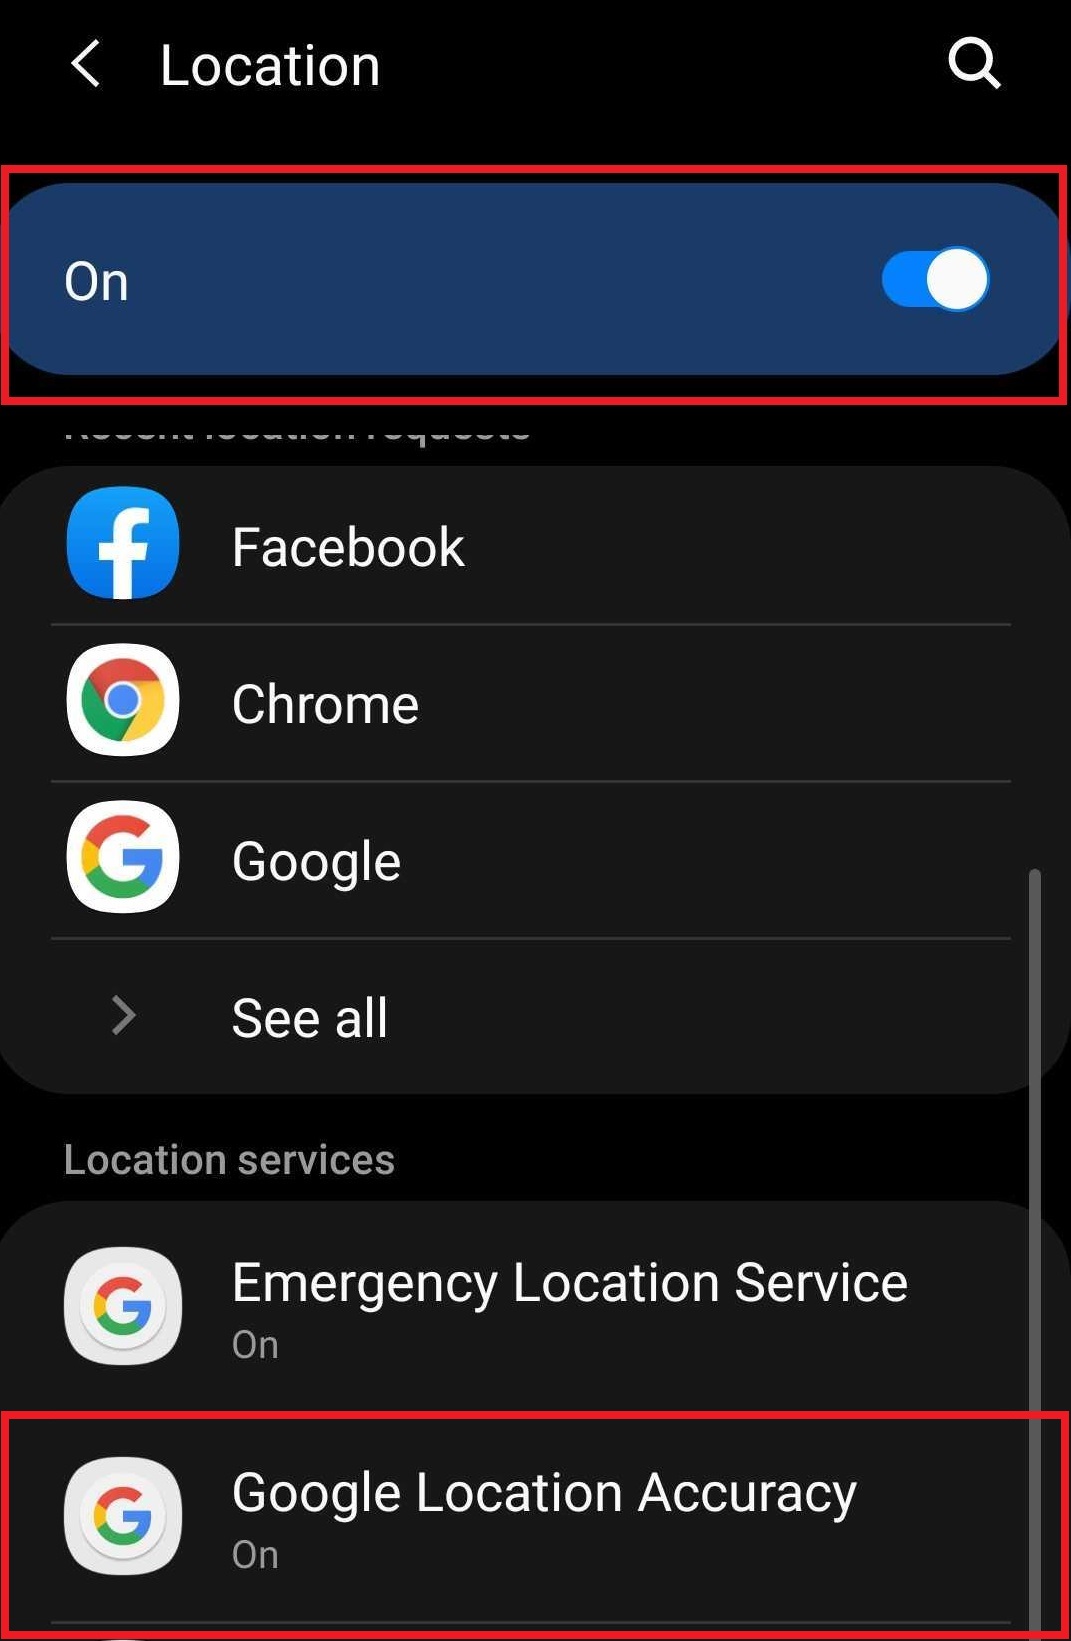
Step 3: Ensure that Location is on. If it is not, move the button to the right to turn it on. Then tap on “Google Location Accuracy”.
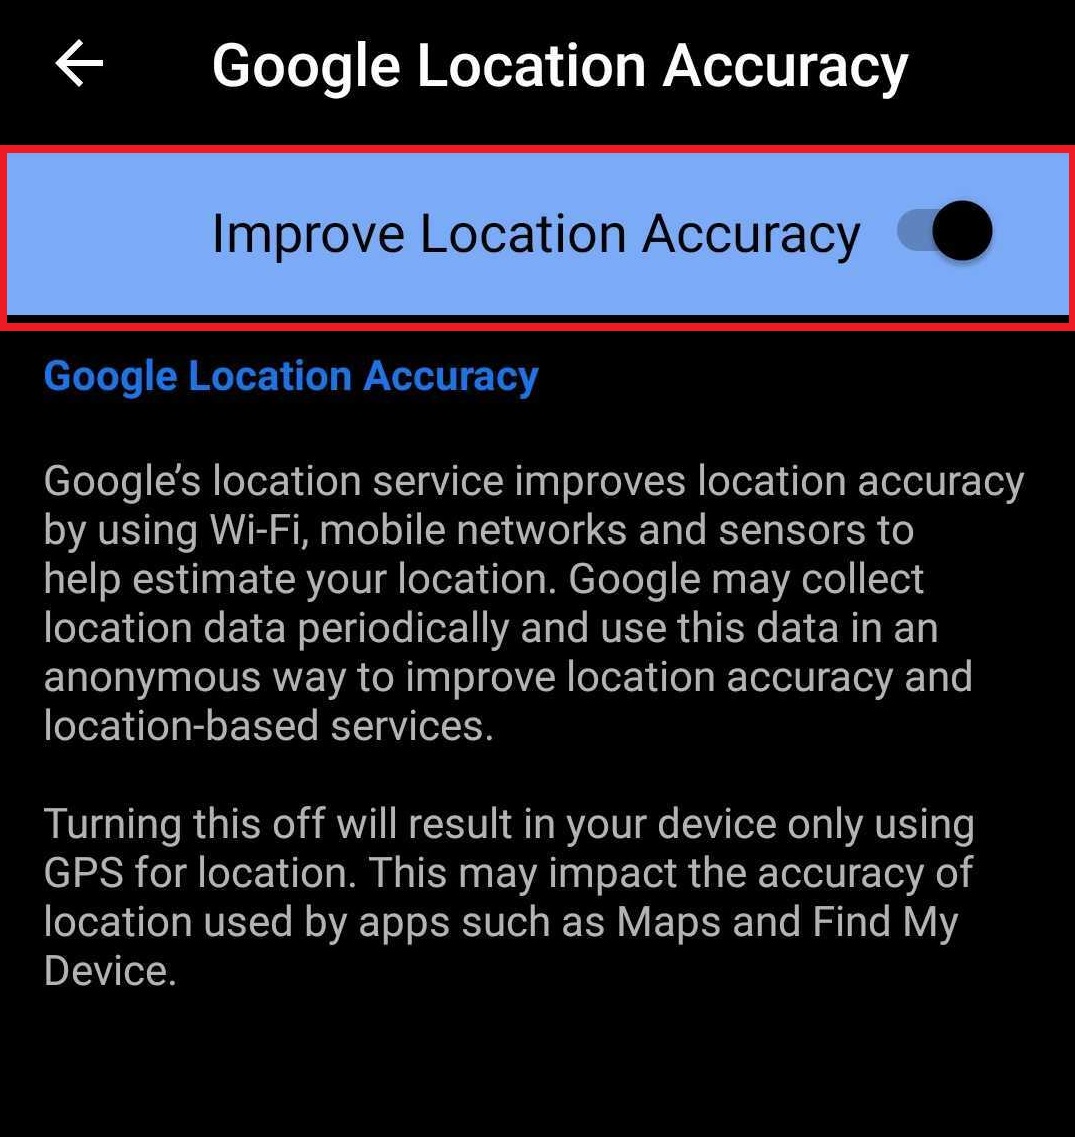
Step 4: Ensure that “Improve Location Accuracy” is turned on. If it is not, then move the button to the right to turn it on. Then go back to the previous menu by tapping the left arrow.
Step 5: On the Location menu, tap on “App permissions”.
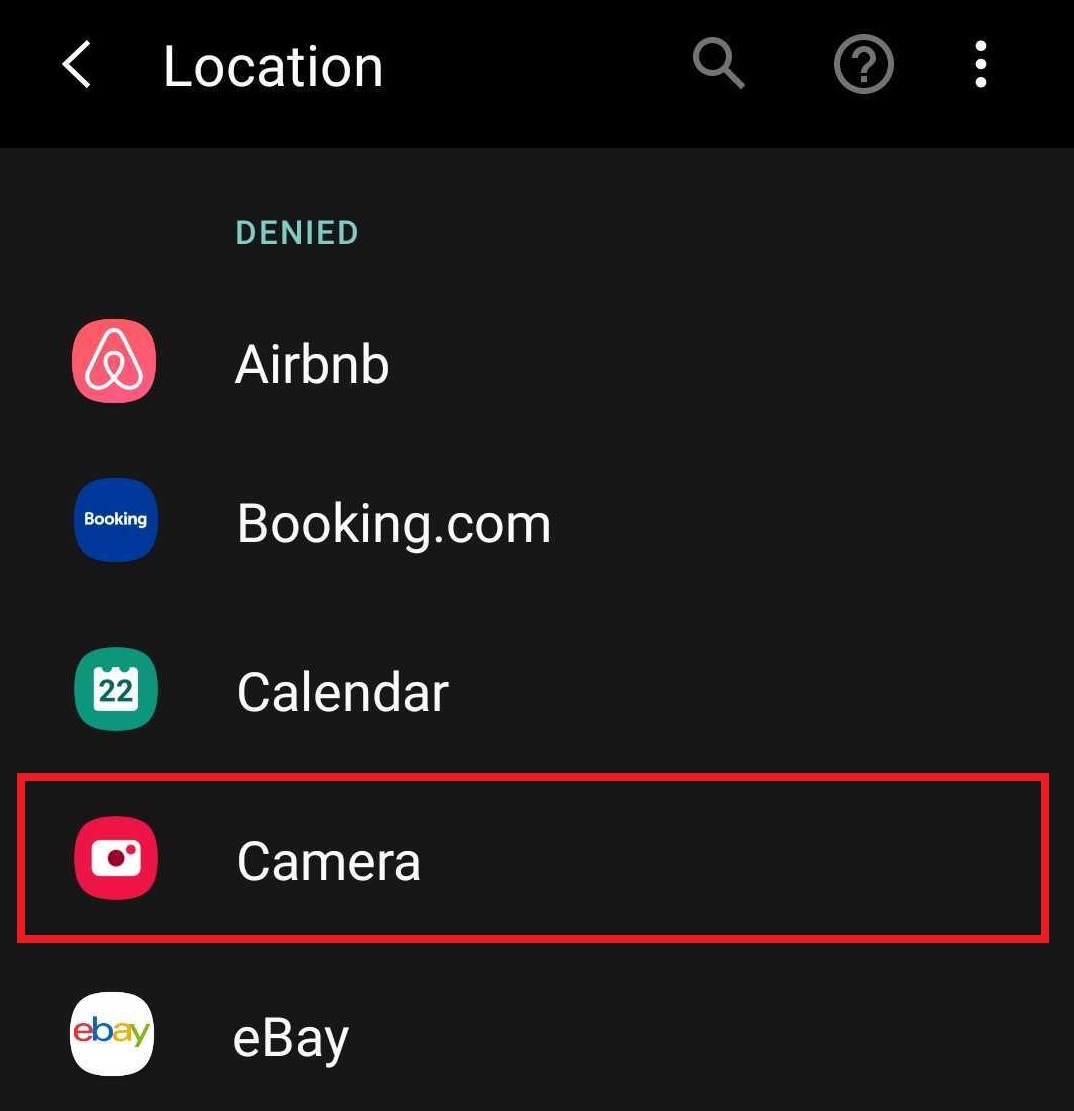
Step 6: Scroll down and tap on “Camera”.
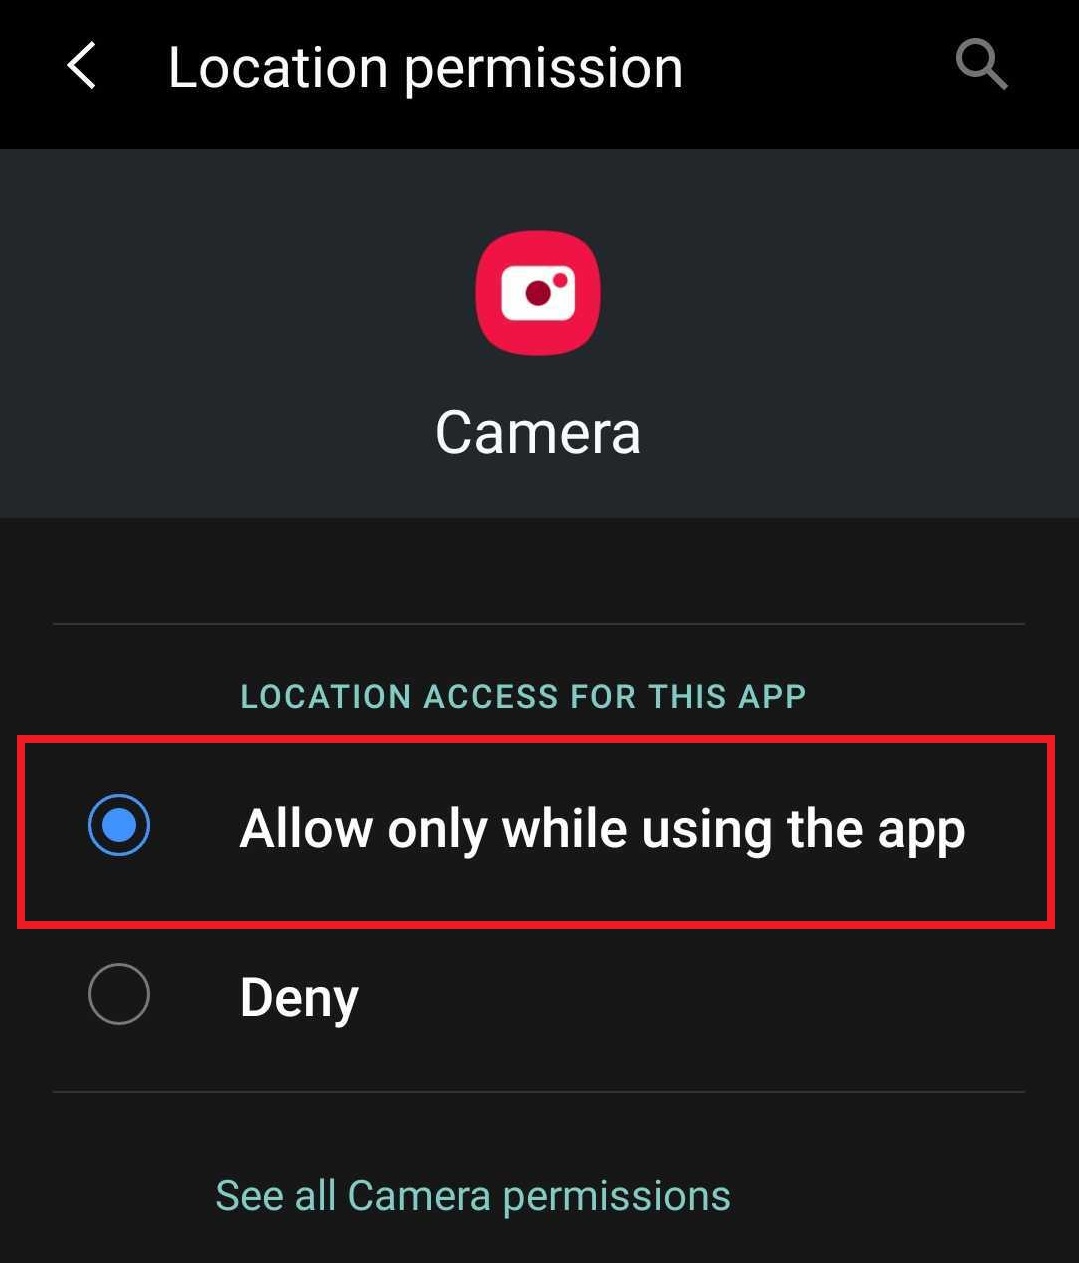
Step 7: Ensure that “Allow only while using the app” is selected. If it isn’t, then tap on it to select it.
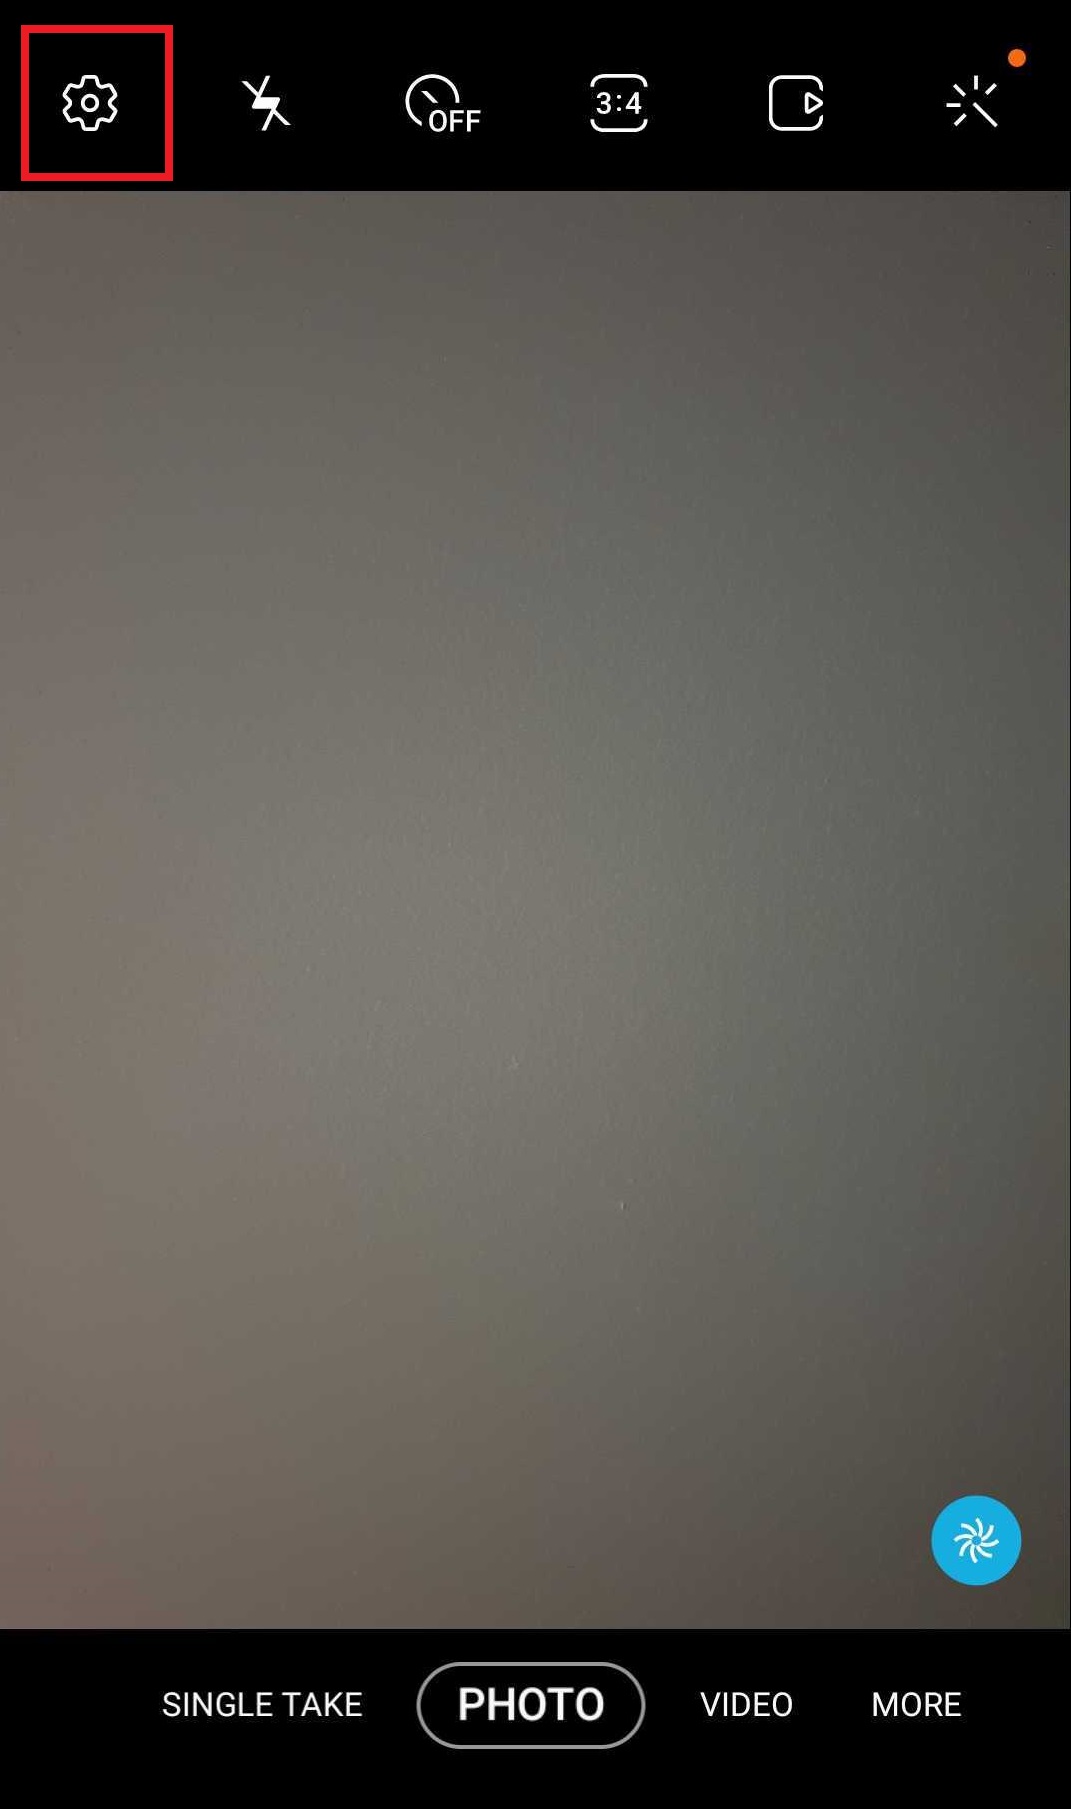
Step 8: Go back to the main menu, open up the camera and tap on the settings icon (the cog in the corner) – this will take you directly to Camera settings.
Step 9: Scroll down and ensure that “Location tags” is turned on. If it is not, then move the button to the right to turn it on.
Note: On certain phone brands / models, there may be a “Save location info” setting instead of a “Location tags” setting. If so, please ensure that it is turned on.

All the relevant settings have now been enabled on your Android device.